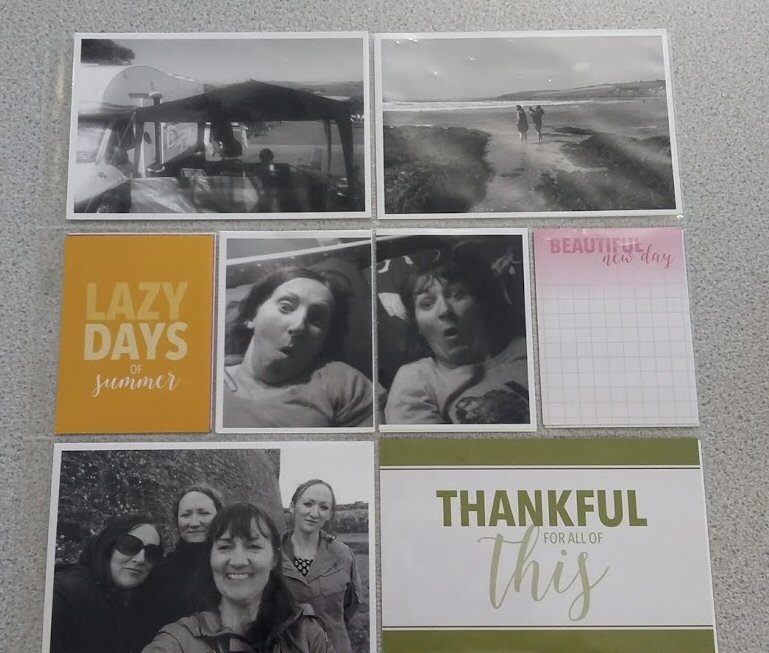
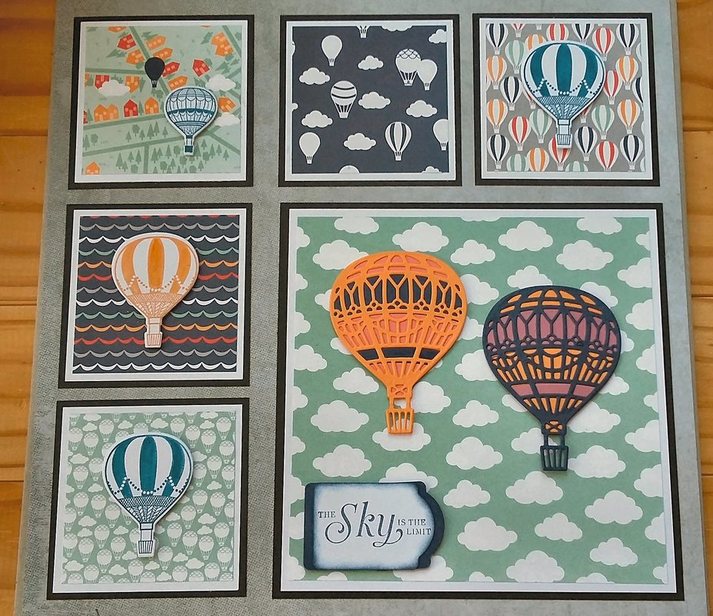
Yesterday I went to a Team Training event with the Stampin Stars, a large group of Stampin' Up! demonstrators, and we used the new Memories and More memory keeping system from Stampin' Up! coming out in the new Annual Catalogue, 1st June 2017. This is a quick and easy form of scrapbooking designed to work alongside our busy lifestyles. I don't know about you but I have taken so many photos on my phone and would be sad to lose but I never seem to download to show them off. A big part of my history is on my phone and I really need to do something about changing that! So to kickstart my first Memories and More project, I printed pictures from my camping holiday in Ireland last year with my sisters. This is an annual trip we organise as we are dotted all around Europe now and this is the one time we make time for just us sisters. (There was a lot of daft carry on as you can imagine!) So having printed the pictures I could then arrange them using the easy pocket page system from Memories and More. I chose some cards, as you can add notes for journal comments on the coordinating card packs, to note down what was happening and dates etc. I don't know about you but I am always keeping bits from holidays and special events and they are in bags and boxes tucked away. The Memories and More album is a great way to display and keep them safe and share off course so my family can see what silly capers their mum, wife, daughter got up to on holiday! I think an album like this would make a great gift for a special occasion, for the mum to be, the bride or anniversary couple, to record and share all those special memories that are for the moment stored on our electronic devices for no one to see. For my next project I am going to start an album for my daughter starting at 0 years and working up to celebrate her 18th birthday, I am sure there will be a few embarrassing pics in there somewhere but memorable too. But first I do have a bit of work to do with this album for my sisters, but this is just the start and I can't wait to add more!
0 Comments
EASTERN PALACE MEETS MOROCCAN DSPI haven't made one of these infinity or never ending cards for a while. I have been busy using the Eastern Palace suite from Stampin' Up! and just had to have a go with the retiring Moroccan DSP, what a perfect match! Buy it while you still can. The card has four different sides and I also used sentiments from the Birthday Blooms set as they matched in perfectly too. I am loving the framelits from the Eastern Palace suite as there are so many different ways to use them. They will be available to purchase in special bundles during May see my previous post here and from the new annual catalogue from Stampin' Up from June 1st. Full PDF instructions to make the Never Ending card can be found here
A sneak peek of the new Eastern Palace suite from Stampin' Up! This set is full of bold and rich colour combinations and comes with a set of detailed dies and beautiful embellishments. You can get your hands on the set starting 1st May 2017 with two exclusive bundle offers from Stampin' Up! including free products with both offers only during this promotional event 1st May to 31st May 2017. So what's on offer? Sneak Peek!! The two exclusive bundles include three of the new In-colour ink pads. Pictured below is the first offer, the Starter Bundle. This bundle has been designed to provide you with all you need to begin creating beautiful cards. You will receive the glorious Eastern Beauty Stamp Set, a pack of gorgeous 12 x 12 papers, THREE of the new In Colour inks in full sized ink pads, gold vinyl stickers and to finish off a FREE set of Very Vanilla note cards and envelopes. All this for £54.75 The second option is the Premier bundle, in addition to the Starter bundle this includes the detailed framelit dies, a co-ordinated pack of A4 cardstock and the assortment of tassel embellishments. You also get a pack of Thick Very Vanilla cardstock and envelopes free (this is instead of the note cards in option 1) The total cost for this bundle is £94.00 See below for details and full list of what is included in each bundle
Only just got the Yummy in My Tummy set from Stampin' Up! and immediately thought I had to make a springy monster. With Mother's Day next weekend here in the UK I thought it best to get crafting. Although I think this design would work for Valentines, Birthdays or just to send someone a hug, that's often just what you need. I made a paper spring from two pieces of pattern paper 12" x 1/2". I remember doing this as a kid when we would make spiders with springy legs! This packs a wow so if you would like to have a go here are the instructions in PDF format. I have also created a video on how to make the spring which you can find below. Full video instructions to follow shortly!
Mouse Critter - Up and away ThinlitsThis week I am using Lift Me Up bundle, thinking outside the box coming up with new ways to use the set. I like to show customers you are getting value for money when purchasing a Stampin' Up! bundle. That's not only with a 10% saving but also the variety of projects you can use a set for. Showing the versatility of a set can have it's advantages too! This card with my little mouse critter uses just 4 of the dies from the set. The large and small balloon for the body, ears and balloons he's holding. The heart for feet, another heart cut in half for arms and finally the clouds to add the extra something on those ears!! Lift Me Up Clear Mount Bundle 144712 Up and Away Thinlits 142748 Lift Me Up Clear Mount Stamp set 142896 This month the Earning Alaska Blog Hop is focusing on the countdown that sees Stampin' Up! Sale A Bration finishing on the 31st March 2017. So if you have fallen in love with the chickens from the Hey Chick set (143331) which at a recent class was a big hit, coloured using the watercolour pencils and an aqua brush. Or perhaps you want to feel uplifted with the Carried Away DSP (143608) which includes 12 sheets, 2 each of 6 double sided designs in 12" x 12" co-ordinating perfectly with the Lift Me Up set. Whatever you prefer the clock is ticking so if you want to take advantage of the amazing freebies including the latest additions you can find all the information here The only problem I think there may be, is having to choose just one of these amazing products but I suppose that all depends on how many things you have on your wish list! So please hop along to see what craft creations Megan has to share with you. So come hop with us
1. Janet Wakeland 2. Pauline Barnfather (you are here) 3. Megan Herst 4. Nichole Loe 5. Cindy Sheets 6. Karina Chin I have been using the Urban Underground Suite for a week in preparation for my class which I held on Saturday. This is one of the projects we made using the Build it Framelits along with the Nailed it stamp set and also sentiments from Urban District. We created our own background paper stamping on half a sheet of Whisper White (A5) which we used on this card and another set of 4" x 4" cards. I used Pacific Point card and layered using Delightful Dijon. I 'borrowed' some sandpaper from my hubby and discovered that you find all sorts of bits and bobs in the toolbox so I added a couple of bits of wood which were off cuts from another project we made using the Hardwood stamp. The screw head embellishments I added to each of the bottom corners are made from the 'waste' when you die cut the nut from the Build it framelits. I just scored each one straight across the centre to make it look like a screw. Here are a set of PDF instructions giving measurements and details on how to make this style of card.
The Urban Underground is orientated more for making male cards but don't let that hold back your creativity as I was able to introduce girl power making a nail file holder using the DSP, Embellishments and Nailed It stamp set.
I have been working on a template all week to make a Pop Up Cube. I wanted to create a simple to follow set of instructions as I would like to use for a craft workshop. So I really did have my engineer head on and was helped by hubby too as I bounced ideas around.
I am preparing for a class using the Urban Underground suite from Stampin' Up! and I really wanted to be able to include this project. I have also created my first video which I will share with everyone before the class. Hopefully this will help on the day! So I used Delightful Dijon and Basic Grey card. I created a shaker card using the Hexagon in the Build It framelits set and I used both stamp sets from the suite to decorate the cube and the Wallet. Window box - wooden box!This is my first blog hop so it's all very new and exciting. The theme is Sale-A-Bration Anything Goes! As I have been having a play with the Window Box Thinlit dies (142762) from Stampin' Up! I thought I could share my latest projects. I have to say the dies are so versatile. I keep looking at my paper crafted 'wooden' box and still can't quite believe it isn't really wood, the effect is really amazing. I used Crumb Cake card stock (121685) and stamped using the Hardwood stamp (133035) with Soft Suede ink (126978). It is really possible for you to create beautiful gift boxes, card holders, tealight holders, even fun characters, using this set. The list just goes on and is only limited by how many hours you have left in the day and there is always Pinterest of course! For my first project using the Window Box Thinlits I created a contemporary style box with a shaker lid. I used the amazing Foam Adhesive Strips (141825) and I have to say they really do make shaker style projects so much easier as you don't have to spend time placing the individual foam pads! The box used Marina Mist card stock (121682) and Brights Sequins (138389) to add the WOW for the shaker lid! The box can be tricky to put together for the first time but I have created instructions and hope they help to make it easier because this really is a great set.
Please hop over and take a look at what Cindy has created
Here is a link to all the other hoppers for this month 1. Janet Wakeland 2. Maureen Rauchfuss 3. Megan Herst 4. Nicole Loe 5. Leonie Schroder 6. Patty Chenail 7. Pauline Barnfather (You are here) 8. Cindy Sheets 9. Jen Guarino I have been using the Sealed with Love suite and tried to create some projects that were not the conventional Valentine theme. I found the Emoji mugs at a local discount store and created a whole gift package. (Home Bargains if you are in the UK) The set consists of the mug, a tag and a card all matching. I used the framelits to create the set. I have attached instructions to show everything you will need for this project. I am sure you could think of quite a few, young and old who would appreciate this gift set! I filled the mug with Chocolate hearts and Love Heart sweets although I have also seen Emoji sweets in stores so they would also work well. I also created little hearts that I glazed to add to the ends of the ribbon using Real Red card layered with DSP from the suite. I used the 3D glaze that Stampin' Up! has now retired although I hear that the Fine Tip Glue works just as well. Just don't be tempted to touch it before it's dry. It will need a good few hours to be safe! I created a stand for the mug using a Pizza style box and just die cut a circle from it to hold the mug in place. I wrapped the mug in cellophane. If you have any of the larger clear bags from the Christmas Seasonal catalogue they work well or A4 clear seal bags also work. Happy Crafting!
|
Hi, my name is Pauline Barnfather and I am a Stampin Up! demonstrator in Basingstoke, UK. Welcome to my Blog!
I get excited about any style of paper crafting so enjoy having a look. I hope my projects inspire you to get crafting! Archives
April 2021
Categories
All
|