This week I have been using toilet roll inners to create a selection of mini albums from the most basic to a very detailed version. I have been collecting the rolls for some time now and ensured they were very flat. You can put them through the Big Shot to help but it's best to put them under some heavy books for a while so they are completely flat.
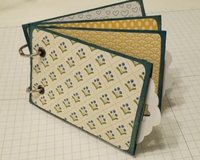
For the most basic version I inked the edges of each roll, on both sides. Then I cut out pattern paper slightly smaller than the roll and glued in place. Finally I used my Crop O Dile to punch holes and add eyelets for binder loops.
Each roll has a tag insert created using the Tag Topper Punch from Stampin' Up!
Each roll has a tag insert created using the Tag Topper Punch from Stampin' Up!
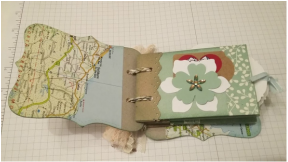
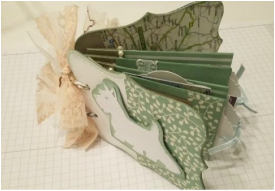
For the next album I made, I created a chip board cover using the Top Note die a retired Stampin' Up! product. This was an album all about a Westie Dog in the family called Poppy. I used four toilet roll inners and this time I covered each roll completely with pattern paper. I added a 1" strip of card to reinforce the end of the roll which has the punched holes. The card I used for the cover and the tags was old packaging material from my Stampin' Up! card and paper purchases!! I wrapped pattern paper around each roll, edge to edge on the width and just added half an inch on the length to tuck under and then glued in place. Here are some examples of how each roll can be decorated to create an album page.

The pattern paper can be cut so that it can be tucked neatly in to the end of each roll and glued in place to give a clean finish. Cut paper to size by measuring the roll length and adding one inch. Then take the roll width x 2 and add one inch. Full instructions can be found below. I have created a deluxe version which I will share next time.
| TP Mini Album Instructions |
 RSS Feed
