mini_pop_up_panel_card_instructions_pdf.pdf |
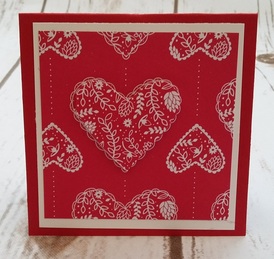
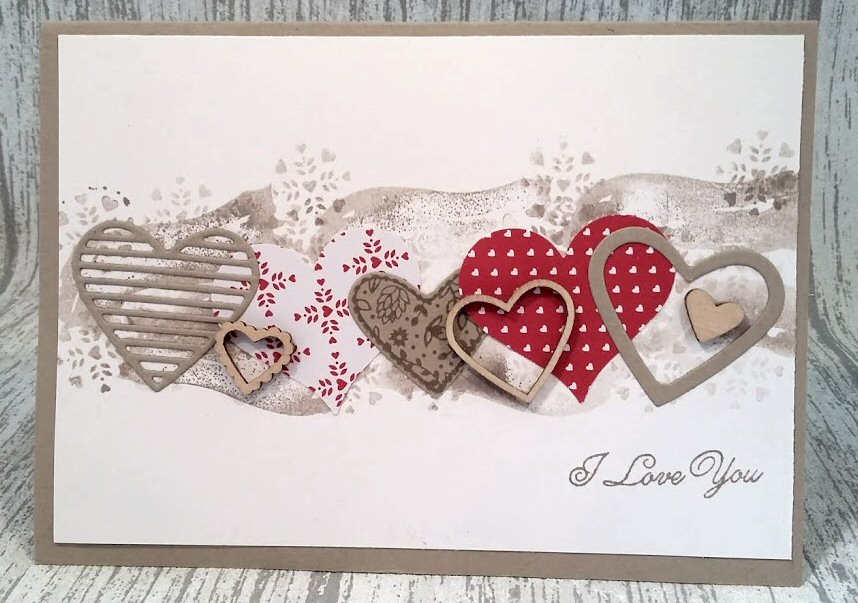
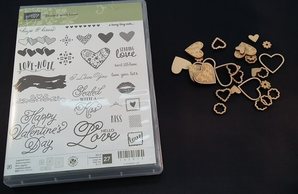
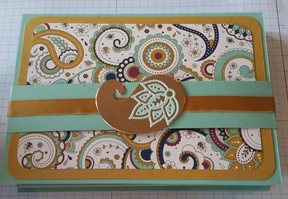
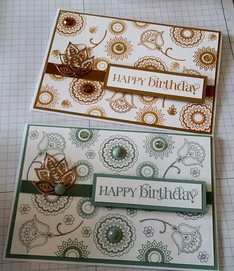
Today I am sharing the pop and twist mini card I created for a recent swap I took part in. I know the pop and twist panel card is not new however I have made it in miniature and it is so so cute. I am back using the Sending Love Suite from Stampin' Up! a new set which will be available in the Occasions catalogue due out 4th January 2017. I have used the DSP and the Sealed with Love stamp set to make this card and I have attached PDF instructions so you can have a go at making a mini pop up card too! If you need any further help making the card please do get in touch, I am always happy to help.
4 Comments
I have been crafting using some new products from the upcoming Occasions (Sale A Bration) catalogue from Stampin' Up! Over the coming weeks I am going to share and give you a sneak peek of products from the new catalogue. I had the great privilege to be part of On Stage at Telford this year and I demonstrated the potential of the Sending Love Suite. The sentiments are beautiful and offer a range of fonts and coordinate perfectly with the matching framelits. It is a set definetly for Valentines Day but I am also going to share projects to show this set can be used all year round. The suite offers the following • Sending Love Designer Series Paper Stack • Sending Love Glassine Sheets • Love Notes Framelits Dies • Real Red 12"x12" Cardstock • Mini Paper Clips Combo Pack • Sending Love Ribbon Combo Pack • Sending Love Embellishments The card I have made uses the Sweetheart Punch to punch out two DSP hearts to add colour to my Crumb Cake based card. The wooden embellishments are very versatile as they can be used as individual pieces or slot inside each other to create a solid heart or flower shape. Full instructions can be found here
This week I made a box frame from an A4 sheet of cardstock. I have done this before using the Butterfly framelits but this time I have created a Christmas theme using the Sleigh Framelits from Stampin' Up! I also used the Soft Sky card with the Woodlands embossing folder and white card with the Waves embossing folder to create the snowscape. The box frame is very easy to create and I have provided full instructions for the frame and the layout. With all the embossing I thought I could enter this into the Stamp Ink Paper Challenge for this week which is all about Embossing. Instructions can be found here for the box frame and details on putting the picture together.
At my recent all day class using the Petals and Paisley suite I made a card and tags box set. This set is very versatile and I want to spend more time exploring how I can use it for all occasions. So the boxed set contained three C6 cards stamped using Delightful Dijon, Mint Macaron and Rich Razzleberry, three smaller 3 x 3 cards using the DSP and accents from the Framelits using Glimmer card and finally a set of tags using the lovely Copper Foil Sheets. Instructions can be found here
I had a class this week using the Petals and Paisley suite of products from Stampin' Up! We made the framed heart CASED from page 46 of the Seasonal Catalogue. I think my version is slightly smaller fitting in a 12" x 12" frame. The magazine image looks more like 16" x 16" now that I have made mine and can compare! I used Night of Navy and Tip Top Taupe ink, I forgot to add the Copper Foil on this picture, just little tear drop sized pieces die cut and then dotted around the image. To make this framed image I die cut a heart shape (it was approx 6" in diameter) from an A4 sheet and then used it as a mask, stamping within the heart shape only. You need to start with the biggest stamped images first and work your way down to the smallest. Don't worry if you make a mistake it really isn't noticeable once it is all framed up. There is even a mistake on the SU version in the magazine so you see no one is perfect!! Here are my instructions
I have had the Pyramid Pals bundle from Stampin' Up! for some time and decided it was time to put it to good use. I have created a treat box and using Window Sheet, given the illusion of 'floating balloons'. Using the Affectionately Yours DSP papers and the Balloon Bouquet punch, it was very easy to put together and the beautiful papers add sparkle with the additional foiled sheets. I know the Washi Tape punch is now retired but it was just a perfect fit for the sentiment and trimming the Gold Glimmer paper to match. Those of you who know me well will know that chocolate is involved!! It fits a Ferrero Rocher chocolate perfectly. Full instructions can be downloaded (see file below)
I attended a Team Training event this weekend and as part of that I was tasked with making 22 swaps and as always I left it right to the last minute just finishing them off on the morning as I was leaving!! Swaps are great way to see products that you often don't have being used in a variety of ways. Also you often get swaps of products that you may not automatically choose to buy and then maybe you can be swayed or if not you still have a great sample to use to show off. My swap used the Cookie Cutter Christmas bundle to make a page/book mark. I stamped two characters for each one and glued them back to back with a 75mm paper clip in between. You can decorate each character, I coloured Santa using Real Red and Basic Black Stampin' Write markers. I added Dazzling Details on the white parts of his clothes, you need to make sure the image is completely dry before you do this, to avoid bleeding of images. The sentiment is taken from Seasonal Bells. I have entered the Stamp Ink Paper Challenge this week as it is for Anything but a Card, I thought these little page markers just perfect! Here is an illustration of how I glued the paperclip in place I used Red Sticky Strip to hold the paper clip in place. I stuck one piece from top to bottom and one piece going side to side. I glued two characters back to back, Santa on one side and the Gingerbread man on the other. I only glued the top half, the head down to the arms. I have left the red protector on so you can see more clearly but you will need to remove it when you glue the other half in place. I used Tombow glue around the edges of head and arms but I left the legs free of any glue as they become part of the holder. I am busy trying to make lots of samples for my showcase class on Saturday. I will be using product from the new Stampin' Up Seasonal catalogue. My card today uses a range of techniques from water colouring, inking, embossing and Origami. I have had a play with old and new as the main image is from the Cookie Cutter Christmas bundle from Stampin' Up! but I have also included Santa in the night sky using the stamp from the Cozy Christmas set available last year.
Today I have used the Santa Thinlits die (141836) from Stampin' Up! to create a shaker gift box. To create the box I used two pieces of card measuring 8" x 8" the base is white and the top is Garden Green. Score at 1 1/2" on all sides for the base and as the top needs to be a little bigger add a 'smidge' approx 1/16" to the scoring measurement on all sides. This is easier to achieve if you use the Stampin' Trimmer (129722) with the scoring blade. The shaker part is a totally separate unit that I made and then glued onto the top of the box. I used Real Red card for the base and Whisper White card for the top. Each piece measured 41/4" I used the amazing new Foam Adhesive strips (141825) which make it so much easier to create shaker cards and off course the Window Sheet (142314) glued in place to keep the Metallics Sequin Assortment (138390) in place and create the 'shaker' part of the card. It is useful to use an Embossing Buddy (103083) to reduce static around the edges of the adhesive strip before you remove the top layer to glue in place. I stamped a sentiment using the Greetings from Santa stamp set on to a strip of Whisper White card. The clear-mount stamp set is available with the thinlits as part of a bundle (143524). I stamped two strips so I could attach one to each end of the box. I used a little Dazzling Details (133755) to bling up the stars. I love getting new punches from Stampin' Up! as I can challenge myself to create other characters and objects. I have had my pre-order goodies for quite a while but have just been too busy to do any crafting. My daughter has just received her exam results and is off to college next week so there has just been so much to sort out and time has just slipped by. So my first play has been using the Cookie Cutter punch. I have created a snowman by cutting out 2 white shapes and 1 black, and then an orange heart which I cut in half to create his nose. Then just a little bit of cutting and sticking and hey presto a snowman. I used the stamp in the set and Tuxedo black ink to create the eyes and the buttons. I added the bow tie as an afterthought. I will have more of a play and maybe trim the hat a little and add a scarf and a candy cane and see what else i can come up with! Happy Crafting!
|
Hi, my name is Pauline Barnfather and I am a Stampin Up! demonstrator in Basingstoke, UK. Welcome to my Blog!
I get excited about any style of paper crafting so enjoy having a look. I hope my projects inspire you to get crafting! Archives
April 2021
Categories
All
|