Upcycled Gift Bag Instructions |
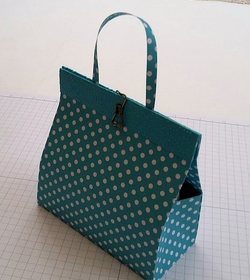
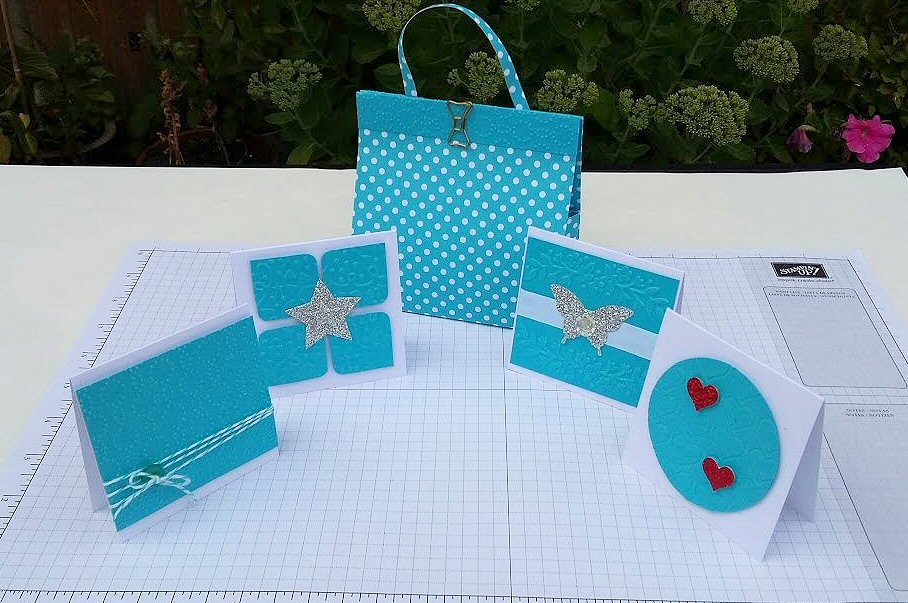
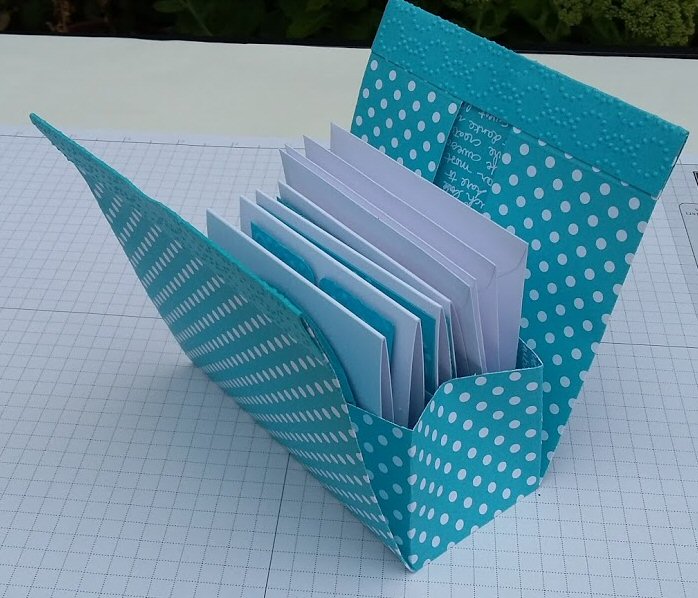
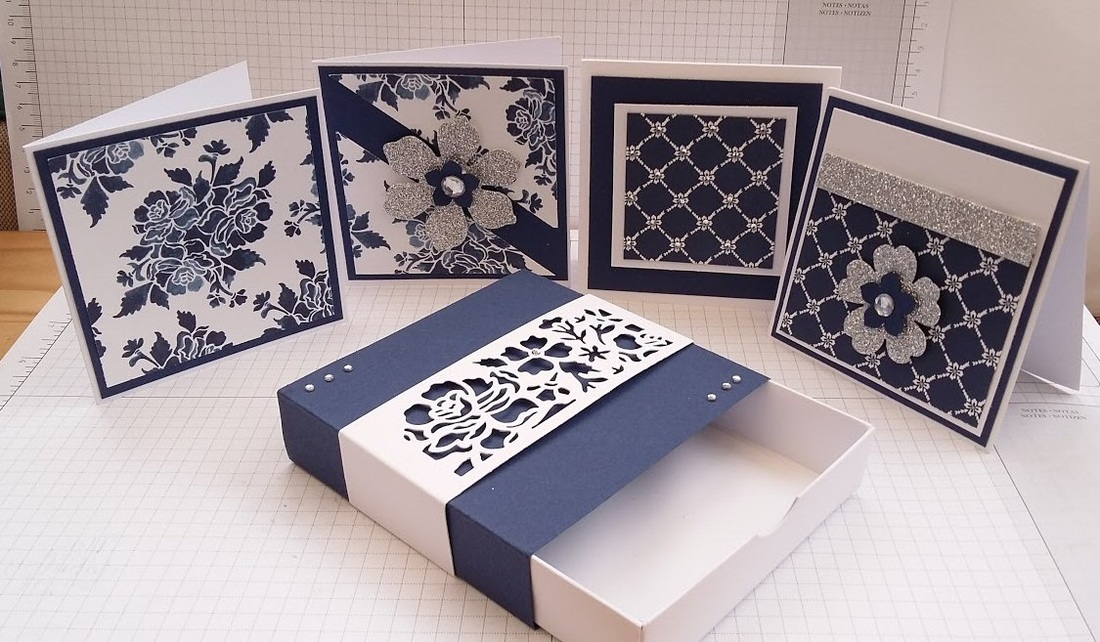
Some time ago one of my crafting ladies gave me a gift bag. It had been made from newspaper with a little card in places to make it sturdy. I had wanted to have a go myself and have finally got around to making some using old Stampin' Up! catalogues. I used the seasonal catalogues as they are easy to take apart. You just remove the staples from the centre pages (carefully of course to avoid any finger damage)! You then have a large selection of double pages which you can use to create your gift bag. 
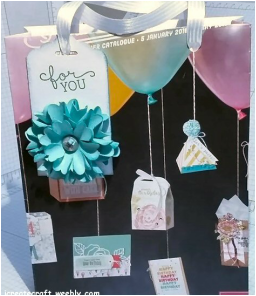
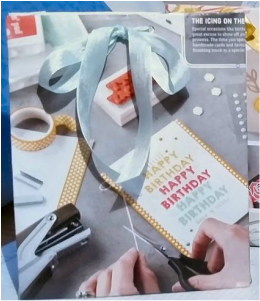
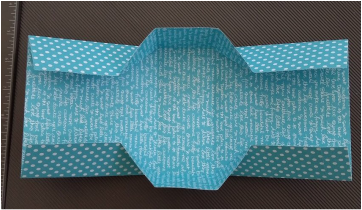
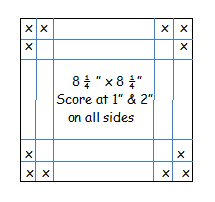
To make the bag you will need to use a score board. I used the Simply Score board from Stampin' Up! Take your double page and keeping it folded in half place it on the score board. Score at 1" 7" and 8" on the short side and on the long side score at 1 1/2" and 9" I used two pieces of card to reinforce the top part of the bag measuring 6" x 1 1/2" and once assembled I also reinforced the base of the bag putting in a piece of card measuring 6" x 2" You can use any scrap card you have I had some cereal boxes which I cut to size. You can make holes at the top of the bag for ribbon using a Crop a Dile or hole punch tool. Please find instructions below.
0 Comments
So I can't believe I am making Christmas goodies in August but with the arrival of my Stampin' Up! pre-order from the Seasonal Catalogue I couldn't resist a play. As soon as I saw the Santa Sleigh framelits I knew I wanted to make it 3D. It's hard to find a chocolate santa in August so I just made a paper one for now! It is a simple box 4 1/4" x 2 1/4" scored at 1" intervals (on the 4 1/4" side) use the 1/4" remaining to create a tab. To create the base turn and score on the short side at 3/4" and cut up each score to the first score line. I may have to adjust once I have the chocolate santa for real. Although I may also have to try Ferrore Rocher chocolate or Hersheys possibly (I love my chocolate). I have taken a top view too so you can get a look. I made a little box as a spacer to use between the reindeers. This was just a scrap off cut scored at 1/4" intervals. The reins are secured using gold off cuts from the carriage base.
This week I have been using toilet roll inners to create a selection of mini albums from the most basic to a very detailed version. I have been collecting the rolls for some time now and ensured they were very flat. You can put them through the Big Shot to help but it's best to put them under some heavy books for a while so they are completely flat. For the most basic version I inked the edges of each roll, on both sides. Then I cut out pattern paper slightly smaller than the roll and glued in place. Finally I used my Crop O Dile to punch holes and add eyelets for binder loops. Each roll has a tag insert created using the Tag Topper Punch from Stampin' Up! For the next album I made, I created a chip board cover using the Top Note die a retired Stampin' Up! product. This was an album all about a Westie Dog in the family called Poppy. I used four toilet roll inners and this time I covered each roll completely with pattern paper. I added a 1" strip of card to reinforce the end of the roll which has the punched holes. The card I used for the cover and the tags was old packaging material from my Stampin' Up! card and paper purchases!! I wrapped pattern paper around each roll, edge to edge on the width and just added half an inch on the length to tuck under and then glued in place. Here are some examples of how each roll can be decorated to create an album page. The pattern paper can be cut so that it can be tucked neatly in to the end of each roll and glued in place to give a clean finish. Cut paper to size by measuring the roll length and adding one inch. Then take the roll width x 2 and add one inch. Full instructions can be found below. I have created a deluxe version which I will share next time.
I recently held a technique class using Dry Embossing to create cards. I made a Clutch style bag containing four notelet cards, they measured 3" x 3" and each used a different embossing folder from Stampin' Up! The techniques used on the small cards could easily be transferred to larger scale projects both in card making and scrap booking. The bag is created using paper measuring 8 1/2" x 11" there is no glue required it is all in the folding. I used Tempting Turquoise for the colour and added Silver Glimmer card to provide bling factor! The template for the bag is quite simple I used the Simply Scored scoreboard and the diagonal plate for additional score lines. The scores create a box shape to store the cards easily. I used a Bow paperclip as a closure. A handle can be created from a strip of coordinating paper if desired, I have taken a picture to show the bag with a handle but I didn't attach to the final project. I embossed two pieces of card to use on the edge of the bag and I did have to use glue for those!! Full instructions for the bag and notelet cards can be found in the PDF file below. Happy Crafting!
I had a request recently from a lady who regularly attends my craft classes, she wanted to do more home orientated projects. I didn't get any more than that so I went back to something I made when I first started crafting - a tissue box cover. Full instructions are available below in PDF format. I used the beautiful Blooms and Bliss Designer Series Paper (141654) from Stampin' Up! The papers co-ordinate with Rich Razzleberry, Blushing Bride, Sweet Sugarplum and then you have Island Indigo, Mint Macaron and Sahara Sand. My colour choice was Rich Razzleberry, Mint Macaron and Blushing Bride all colours found in the Blooms and Bliss papers. The box base is two strips of Sahara Sand card stock and then a square for the top is all that is required. The two strips are scored using the Simply Scored tool (122334). I layered the DSP on Whisper White and then on to Mint Macaron card. Two panels had DSP and two panels I stamped using the two smallest stamps from the Beautiful Blooms stamp set. I often ignore the small stamps in sets but I am really glad I didn't in this instance. I created a random stamped pattern for the sides and on the lid too. I used Deco Labels framelits layered together to create a frame of white card and a Mint Macaron frame to layer around the hole where the tissues pop out. Sadly these have retired but Lots of Labels (138281) would work just as well.
Today I am sharing this little notelet set and box I made using the beautiful Floral Boutique Suite from Stampin' Up! The papers remind me of China cups and Willow patterns from days gone by. There is a mix of hand painted floral designs floral designs as well as geometric patterns with stripes and spots to add a few. The Detailed Thinlit die set (141482) cuts a beautiful and delicate floral pattern which I used to create the decorative panel for the front of the box. The cards are 4" x 4" and I used a 6" x 6" square of Floral Boutique Designer Series Paper (141663) cut in such a way I could decorate the complete set of cards. I just added Silver Glimmer paper (135314) and Rhinestones (119246) to add the bling factor! The box base is double walled and uses an 8 1/4" x 8 1/4" piece of thick card stock scored at 1" and 2" on all sides. Then you just create tabs by cutting away three of the squares (x marks the squares to cut away) I have added a pic hope it helps! The sleeve is made by cutting a long strip of card from an A4 sheet which measures 4.5” x 11.7” (inches) keep other piece to use for notelet card layers. Score on the long side at 2 3/8” 3½” 8” and 9 1/8” Then just wrap around the base and glue. I have provided full instructions below so Happy Crafting!! If you need any more information on how to make this set or if you are interested in buying any of the Stampin' Up! product range please get in touch (see below for more details)
Good evening crafters. Well here is my first official post. I have just started a new chapter in my crafting journey as I have joined the Stampin Up! community as a demonstrator. This week I completed my second class concentrating on cards for all occasions. Here is a picture of my workshop all ready to go. I made a bunting decoration showing some amazing punched shapes and die cuts available from Stampin Up in the amazing colour ranges too. That is one of the best features of the SU range everything co-ordinates perfectly papers, card, embellishments and ribbon! What more could you ask for!
|
Hi, my name is Pauline Barnfather and I am a Stampin Up! demonstrator in Basingstoke, UK. Welcome to my Blog!
I get excited about any style of paper crafting so enjoy having a look. I hope my projects inspire you to get crafting! Archives
April 2021
Categories
All
|